👉
Download VRC Update (v1.1.10.0)Recently, in another thread on this forum, users were asking to add new streaming triggers directly to vMix.
We decided that VRC is perfectly equipped to solve this task, so we've added them in this update!
🛡 Watch Rules (Smart Monitoring)
Broadcast and recording control is now even more reliable!
We heard your feedback on the vMix forums, and this update brings highly anticipated improvements to the monitoring and auto-correction systems.
New Stream Triggers: Added "Start Stream" and "Stop Stream" events.
Stream Channel Selection: Channel selection is now available directly for the new triggers.
You can specify a particular stream channel for the trigger to react to (or let it fire on any started or stopped channel).
Flawless Auto-Fix: Significantly improved the reliability of automatic violation fixes.
Complex rules that monitor one device but send correction commands to another now work flawlessly without any mix-ups between machines.
🚀 Shortcut Management
Multiple Selection: Added the ability to select multiple shortcuts in the list at once.
Batch Actions: You can now quickly duplicate or delete an entire group of selected shortcuts in a single action.
Improved Search: Search is now triggered by clicking the corresponding button in the interface.
🎬 Broadcast and Transition Management
Fine-tuning Transitions: You now have granular control over how scene changes occur.
Added the ability to specify the exact duration (speed) of each transition, as well as select a specific Mix channel for the effect.
🖥 Monitoring and Interface
External Indication: Added new status indicators for External 1–4 outputs on device monitoring cards (information is displayed if your vMix version supports transmitting this data).
Text Updates: Added new translations and interface texts for all new features.
Optimization: The application now runs slightly faster due to the optimization of hidden background processes.
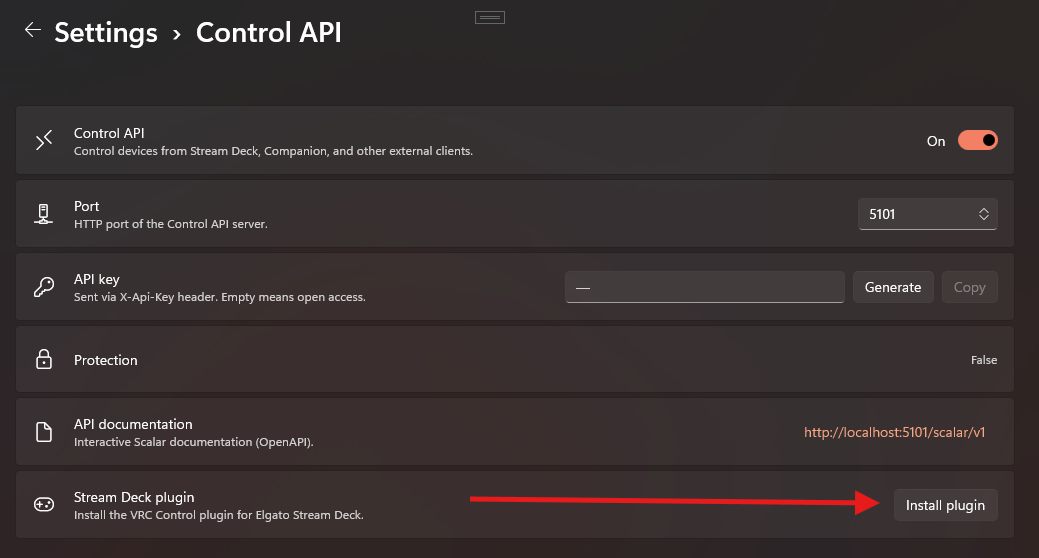
⚠️ Important Update Instructions
To ensure the new feedback mechanisms work correctly, a clean installation of the Stream Deck plugin is required:
Completely uninstall the previous VRC plugin from your Stream Deck app.
Install the new version of the Stream Deck plugin included in this release.
Plugin Stability Improvements:
The Stream Deck plugin's stability has been significantly improved. It now handles various edge cases flawlessly, including:
Unexpected disconnections of the plugin, the VRC app itself, or connected devices.
Scenarios where the Stream Deck plugin is launched after VRC is already up and running.
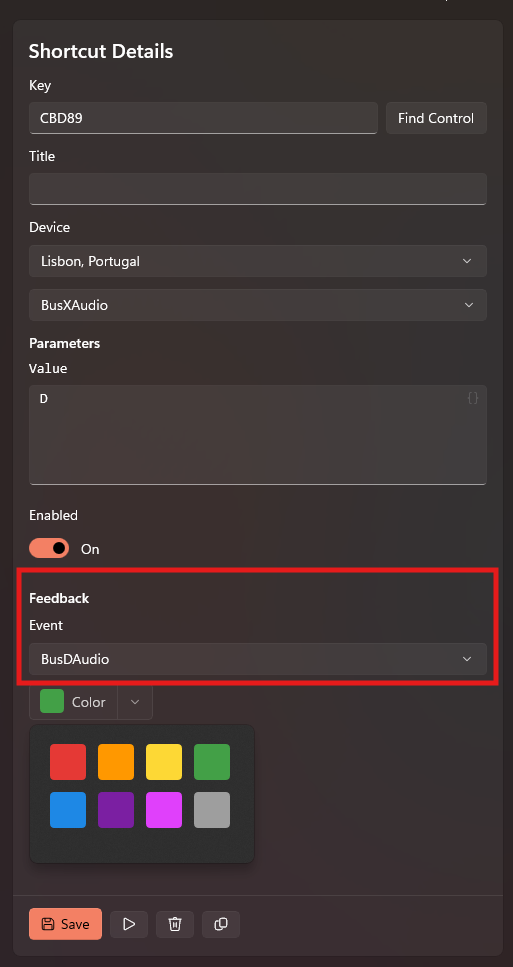
Screenshots of New Features:Watch Rules & Stream Events: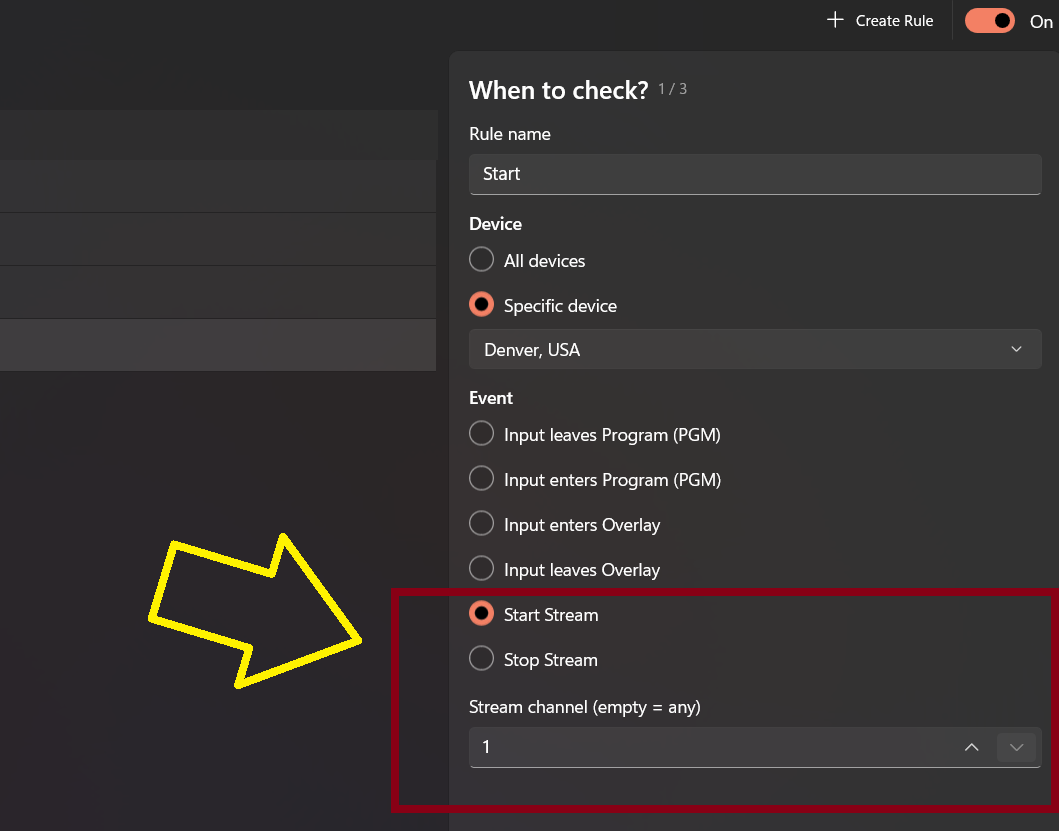 Shortcut Duplicate & Delete:
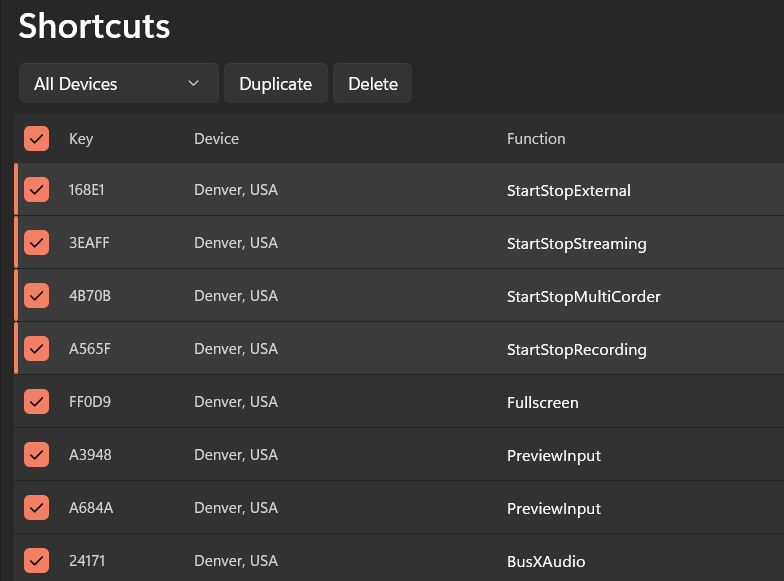 Transition Settings (Duration & Mix):
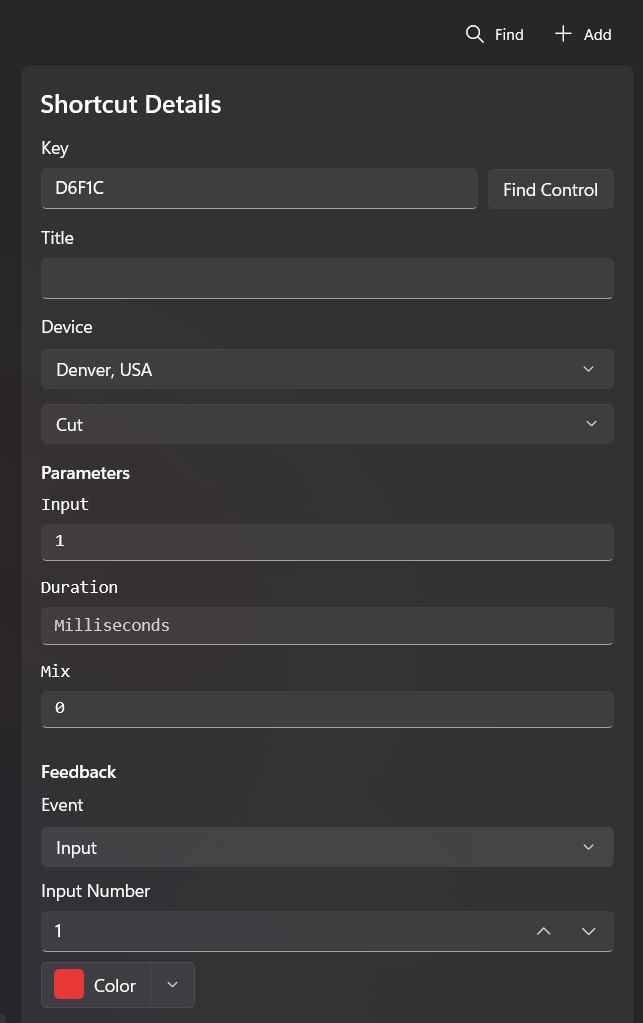 External Renderer Indication:
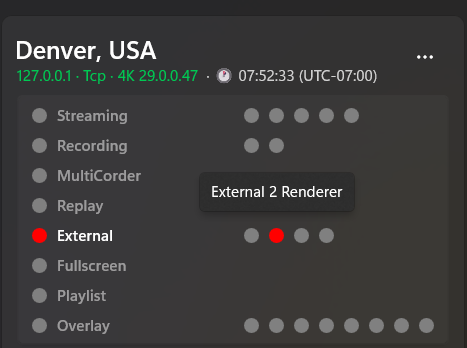 Improved Search:
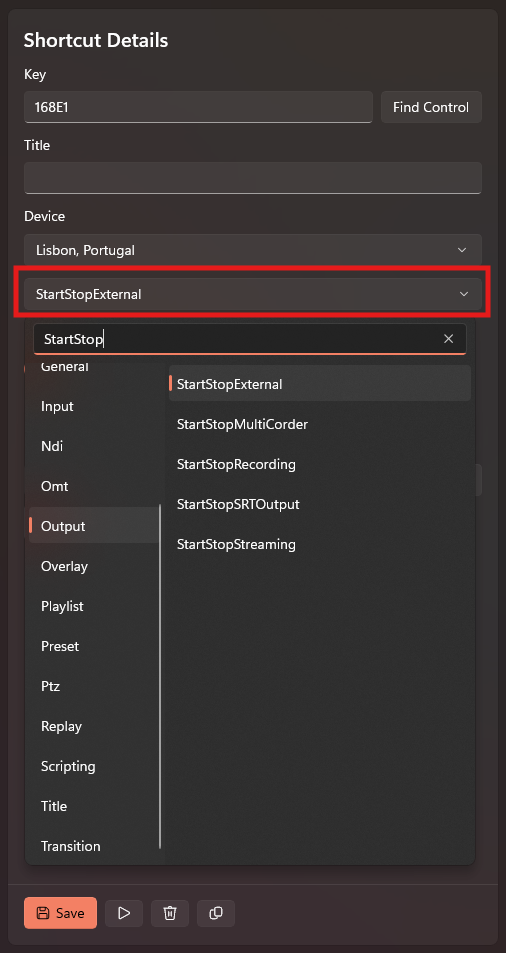 Plugin Installation & Feedback: